
Now getting started by C# we have some requirements so that we can learn about this beautiful programming language. In this article I a have to tell you that what IDE should we need and how to install it and then start our journey ok.
NOTE : IDE Stands for Integrated development Environment. now

What is IDE ?
How to install Visual Studio
IDE stands for Integrated Development Environment. It is a software application that provides comprehensive tools and features to facilitate software development. IDE’s typically include a code editor, compiler or interpreter, debugger, and other tools necessary for writing, testing, and debugging code in various programming languages. These integrated tools streamline the development process, enhance productivity, and simplify the creation of software applications. I hope you all clear about this term if any problem comment me please i will elaborate you more!!
C# IDE
The easiest way to get started with C#, is to use an IDE. An IDE (Integrated Development Environment) is used to edit and compile code. You can download this IDE from Visual Studio Community, which is free to download from just click this link and install the required IDE.
Link : https://visualstudio.microsoft.com/vs/community/.
Applications that written in C# use the .NET Framework and libraries , so it makes sense to use Visual Studio, as the program, the framework, and the language, are all created by Microsoft Company.
How to install C# IDE / Visual Studio ??
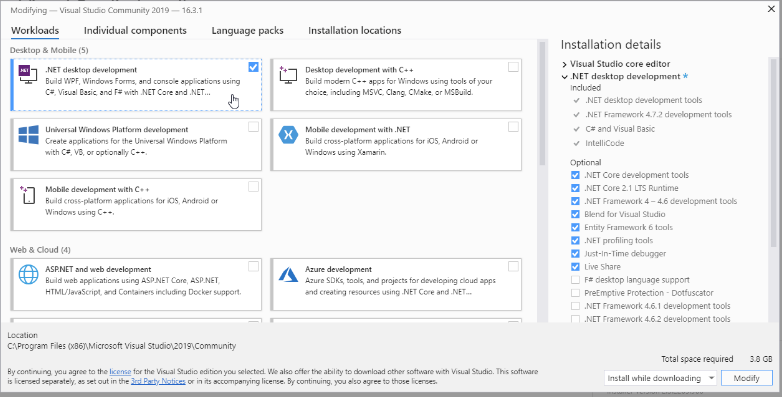
Once the Visual Studio Installer is downloaded and installed, choose the .NET workload i.e the package you want and click on the Modify/Install button:
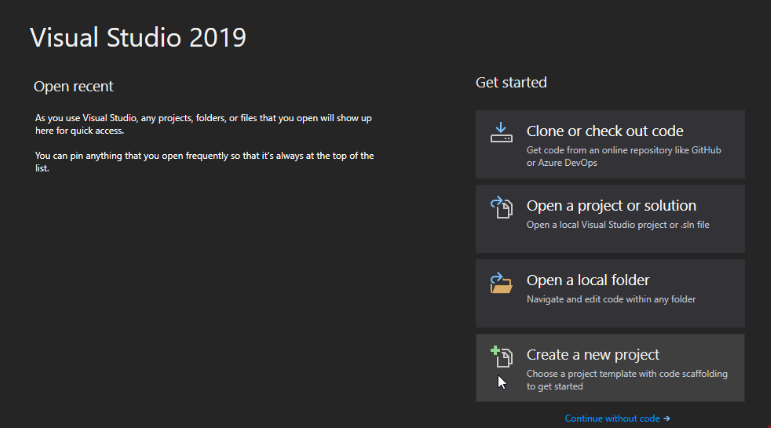
Now , When the installation is complete, click on the Launch button to get started with Visual Studio. On the start window, choose Create a new project:
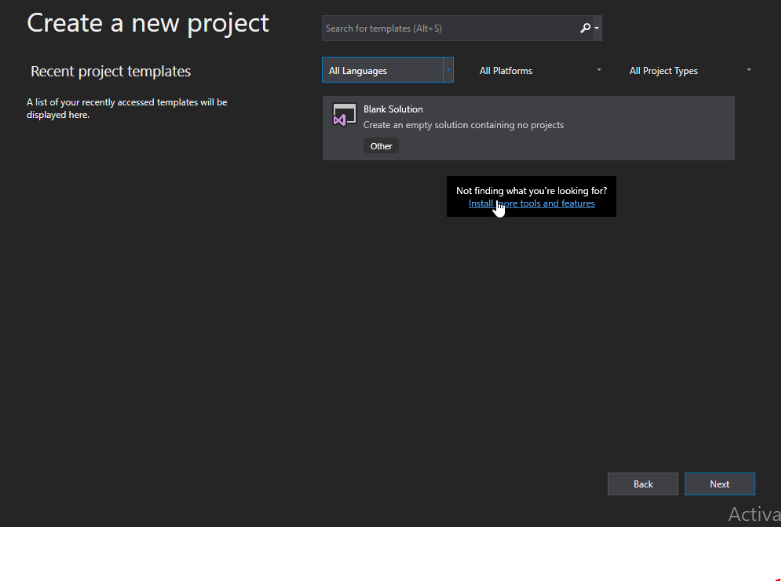
Then click on the “Install more tools and features” button:
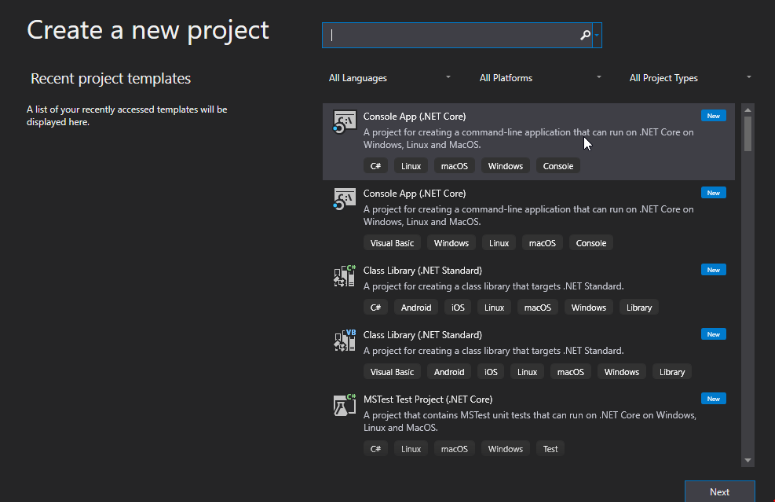
Choose “Console App (.NET Core)” from the list and click on the Next button:
Enter a name for your project of your own choice , and click on the Create button:
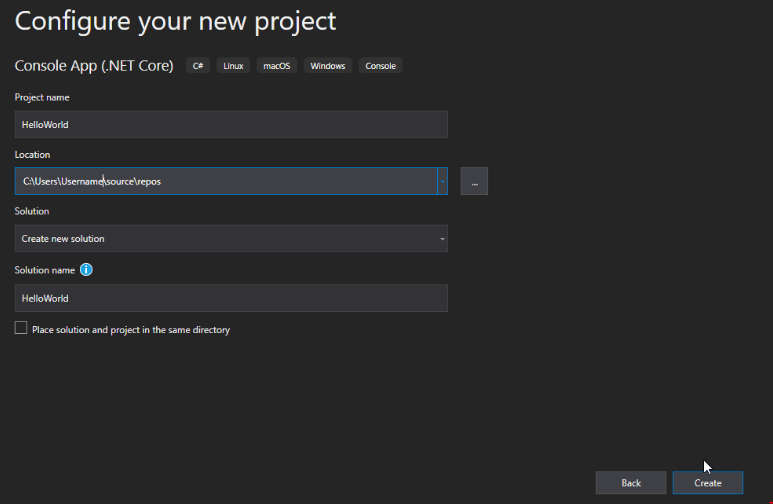
Visual Studio (our IDE) will automatically generate some code for your project that you have made
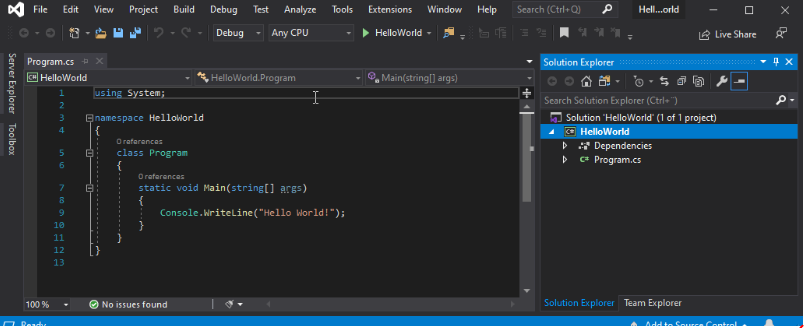
The code of your project should look something like this:
using System;

namespace HelloWorld
{
  class Program
  {
    static void Main(string[] args)
    {
      Console.WriteLine("Hello World!");
    }
  }
}
Don’t worry if you don’t understand the code above – we will discuss it later in detail . For now, focus on how to run the code.
Run the program by pressing the F5 button on your keyboard (or click on “Debug” -> “Start Debugging”). This will compile and execute your code & generate some output or results. The result will look something to this:
Hello World!
C:\Users\Username\source\repos\HelloWorld\HelloWorld\bin\Debug\netcoreapp3.0\HelloWorld.exe (process 13784) exited with code 0.
To automatically close the console when debugging stops, enable Tools->Options->Debugging->Automatically close the console when debugging stops.
Press any key to close this window . . .
Congratulations! You have now written and executed your first C# program
now if you have any query related to this topic you can ask me feel free to contact.
Link: https://Codelikechamp.com
Medium Link: Follow me on Medium
Linkedin Link: Follow me on Linkedin
nice blog